Make Your Mark @The Compound Gallery

IMG_1885

Are you afflicted with kinesthetic connection? Do you still like to write or draw with a pen or brush on paper? Do you get an oxytocin hit from feeling the feedback of the paper through your mark-making tool?

We have help for you. The only cure is to get closer to that connection. Make Your Mark gives you the means of making your own writing, drawing, painting tools. In three hours you’ll learn to make a quill pen, a reed pen and a soda-can folded pen (modified ruling pen). You’ll also get the chance to play with these tools with different paper and media – ink, gouache or watercolor.

Once you know the ancient (anything older than last year is ancient, right?) ways of making your own tools, you’ll have the means to connect even more with your work.

Make Your Mark workshop at The Compound Gallery
1167 65th st. Oakland, CA 94608
Saturday, June 18, 2016. 1:00 – 4:00 p.m.
$33 workshop + $7 materials = $40
Feathers and bamboo sticks if you want to bring them.

Ruling Pen Workshop

Workshop Flyer Written WIth Ruling Pens

Workshop Flyer Written WIth Ruling Pens

How to Write with a Ruling Pen on Vimeo

Click link above for a short video

I’ll be teaching a workshop on how to use a fun calligraphy tool – the Ruling Pen. For the last 80 years, scribes have been using this “new” writing instrument to express themselves by making letters that break away from the broad edge pens of past scribes.

The pen makes its mark by being pulled and the ink is dragged out of the side of the instrument. One can vary width by what part of the instrument is being dragged across the surface – sideways. Using the pointed tip gives the scribe the chance to make small, fine letters. Working with the side of the tool, greater width strokes are possible.

Because the color is pulled out the side, there is greater inconsistency to the edge of the letterform. Add a rough-textured paper and the result is an even coarser edge. Often, splatters appear on the paper as the color is flung out when the pen is drawn across the uneven surface.

All skill levels can take this workshop. 

This workshop will teach how to use the tool, adding color and working it to greatest advantage. Students can use their own handwriting or modify calligraphic hands that they’ve learned.

The workshop is $60 for four hours of instruction and practice. The $10 fee supplies paper, ink and gouache colors to use in creating your written art. We will experiment with different papers to understand how to exploit the tool’s unique mark-making characteristics.

Ruling Pen Workshop  – Sunday, October 27, 2013
1:00  –  5:00 pm $60 +  $10 materials fee (paid at workshop)

Negative shapes

Stained C Gouache on paper

Stained C
Gouache on paper

The positive defines the negative – that is how letters work. Manipulating that relationship never gets old for me. This big ol’ C was fairly simply and directly made – a few colors painted and blended on a large sheet of paper. It got a little interesting when I sprayed water on the painted surface and let it bleed. There’s a three-dimensional quality that comes about in the staining that is far greater than on the paper itself.

A 12" square S made with acrylic paint

A 12″ square S made with acrylic paint

After talking with a few artists, I decided to move up to paint. Starting with an “open” acrylic, I gave it a try on a manufactured gessoed 12″ wooden panel. I was surprised at how easy it was to work with the color and how well it responded to watercolor technique.

B drippin'

B drippin’

And this one – where the negative becomes positive, leaving the B shape as the background. With a little staining, once again. For some reason color bleeding into the white space attracts me.

LETTERS: Writ Large!

Image

This coming Friday, June 7, 2013 I will be in a group show in Oakland, CA. I’m calling my part of it “LETTERS: Writ Large!”

This is the first show in which I’ve had work in a long time and I’ve been painting & lettering quite a bit in the past month. You saw the beginnings in my last post and I’ve added a number of pieces to the  pile. I’ve gotten more comfortable and confident at working large and am getting to enjoy the process. 

The show will give me a chance to see what all these letters look like spread out in a big space. 

Breaking the component parts of language back down to letters – and exploring how to paint a letter have been interesting. Getting past my internal letterform editor and allowing the letters to be and become formed as they are was tough.

Image

I found that if the shape of the letter wasn’t what I had in mind, then I presumed it was not any good. But friends that have seen them have found things in these imperfect letters that I didn’t see at first. The bowl of the P above is greater than a Trajan P would be. And I had a Trajan P in mind when I made it, so this is a failure. From that ideal.

The letter comes alive and its imperfection becomes an aspect of its personality. 

Image

Styles and techniques got thrown together and pulled apart. Using tools in ways I hadn’t used them before makes for some fun discoveries and forces a looseness that is counter to my training.

I’ve got more to say, but for now, I’ll leave you with a Tessellated T

Image

Interview with Jennie Hinchcliff; proprietoress of redletterdayzine blog

Jennie Hinchcliff will be teaching two classes:

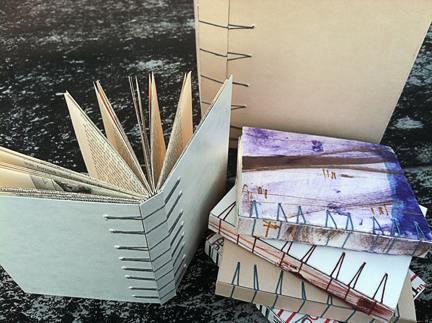
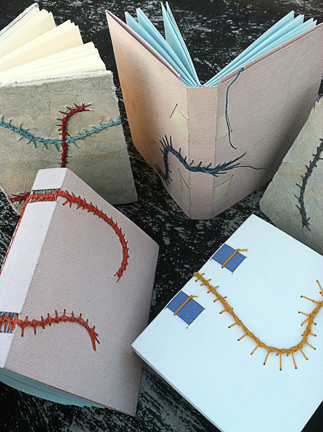
Structures With Style: Secret Belgian Binding Class – March 9, 2013
10:00 am – 5:00 pm$120 + 20 materials fee (must bring to class)

hinchcliff_belgian_02           hinchcliff_belgian_03


hinchcliff_belgian_05


Creative Caterpillar Binding Class – March 23, 2013
10:00 am – 5:00 pm $120 + 20 materials fee (must bring to class)

hinchcliff_caterpillar_06      hinchcliff_caterpillar_02

Jennie’s a lot of fun & is a talented ball of fire. I had the pleasure of working with her when I taught at the SFCB and then when we were on the board of the Pacific Center For Book Arts. I keep thinking up things to do with her because she’s always got a great attitude and comes up with great ideas and projects.

I wrote Jennie a few questions that seemed pertinent to let students know what kind of teacher they would encounter in these great classes. Of course, I wanted to be serious. 

Why are you a book artist/postal modern, instead of the ruler of the free world?
“Ruler of the Free World” is a great title to put on the ol’ CV, but it seems like a straight up 9-5 job…I’m pretty attached to keeping my own hours.

Did you ever think you’d be making a living by making art?
I can’t imagine how else I’d be making a living, to tell you the truth.

What is it about mail-art that fascinates and enthralls you? 
I love the whole philosophy of mail art: anyone can take part, that it can be as simple or as complicated as one wants and people exchange with each other because they want to — not out of obligation.  Mail art goes far beyond being passionate about the USPS, although that definitely plays a part. The artists and letter writers I’ve met through the mail art Network are incredibly creative; I feel so fortunate to correspond with the likes of Cascadia ArtPostJohn Held, Jr., Reed AltemusSally Wurlitzer…there are too many to name, all truly talented artists. Every time I stop by my PO box, it’s like Christmas and my birthday all rolled into one. Mail artists have a saying, that “the mailbox is a museum” and it’s oh-so-true.

When did you know that making books and doing mail-art wasn’t just a passing fancy?
I’ve always made things with my hands; as a kid I would make little books and fill them with goofy stories. My grandmother and I would make origami animals or glue up collages — things like that. I was first introduced to mail art when I checked out the book “SWAK: The Complete Book of Mail Fun for Kids” by Randy Harelson from my grade school library; as a fifth grader, I couldn’t believe that there was a community of people who sent wacky things to each other through the mail. Because things like paper, postage, and books are so much a part of who I am, I never considered them as passing fancies.

What is your five-year plan for changing the world through your artistic endeavors? 
Well, I can neither confirm nor deny that my five year plan is currently in effect. But I can tell readers of the Biblioforge blog that the plan-which-shall-not-be-named will involve plenty of stamps (postage AND rubber!), lots of postcards, and a workshop or three. There might even be an artist book series and a postmaster thrown in for good measure.

Will you show mercy on the congressional ogres that keep undermining the good in the USPS once you’ve taken control?
(Taking a deep breath, stepping away from the soapbox) I think that every lawmaker who has had a hand in decimating the USPS should have their Saturday delivery service taken away and their free mailing/postal privileges revoked. This would be a step in the right direction towards awareness of how important the USPS is to individuals, as well as the country. Fact: the current USPS vs. the US government situation is confusing, but anyone who uses the postal system should understand the basics of how this happened. And then, I would invite Biblioforge readers to sign the “The Post Office Isn’t Broke, It’s Being Robbed” petition.

Final thoughts?
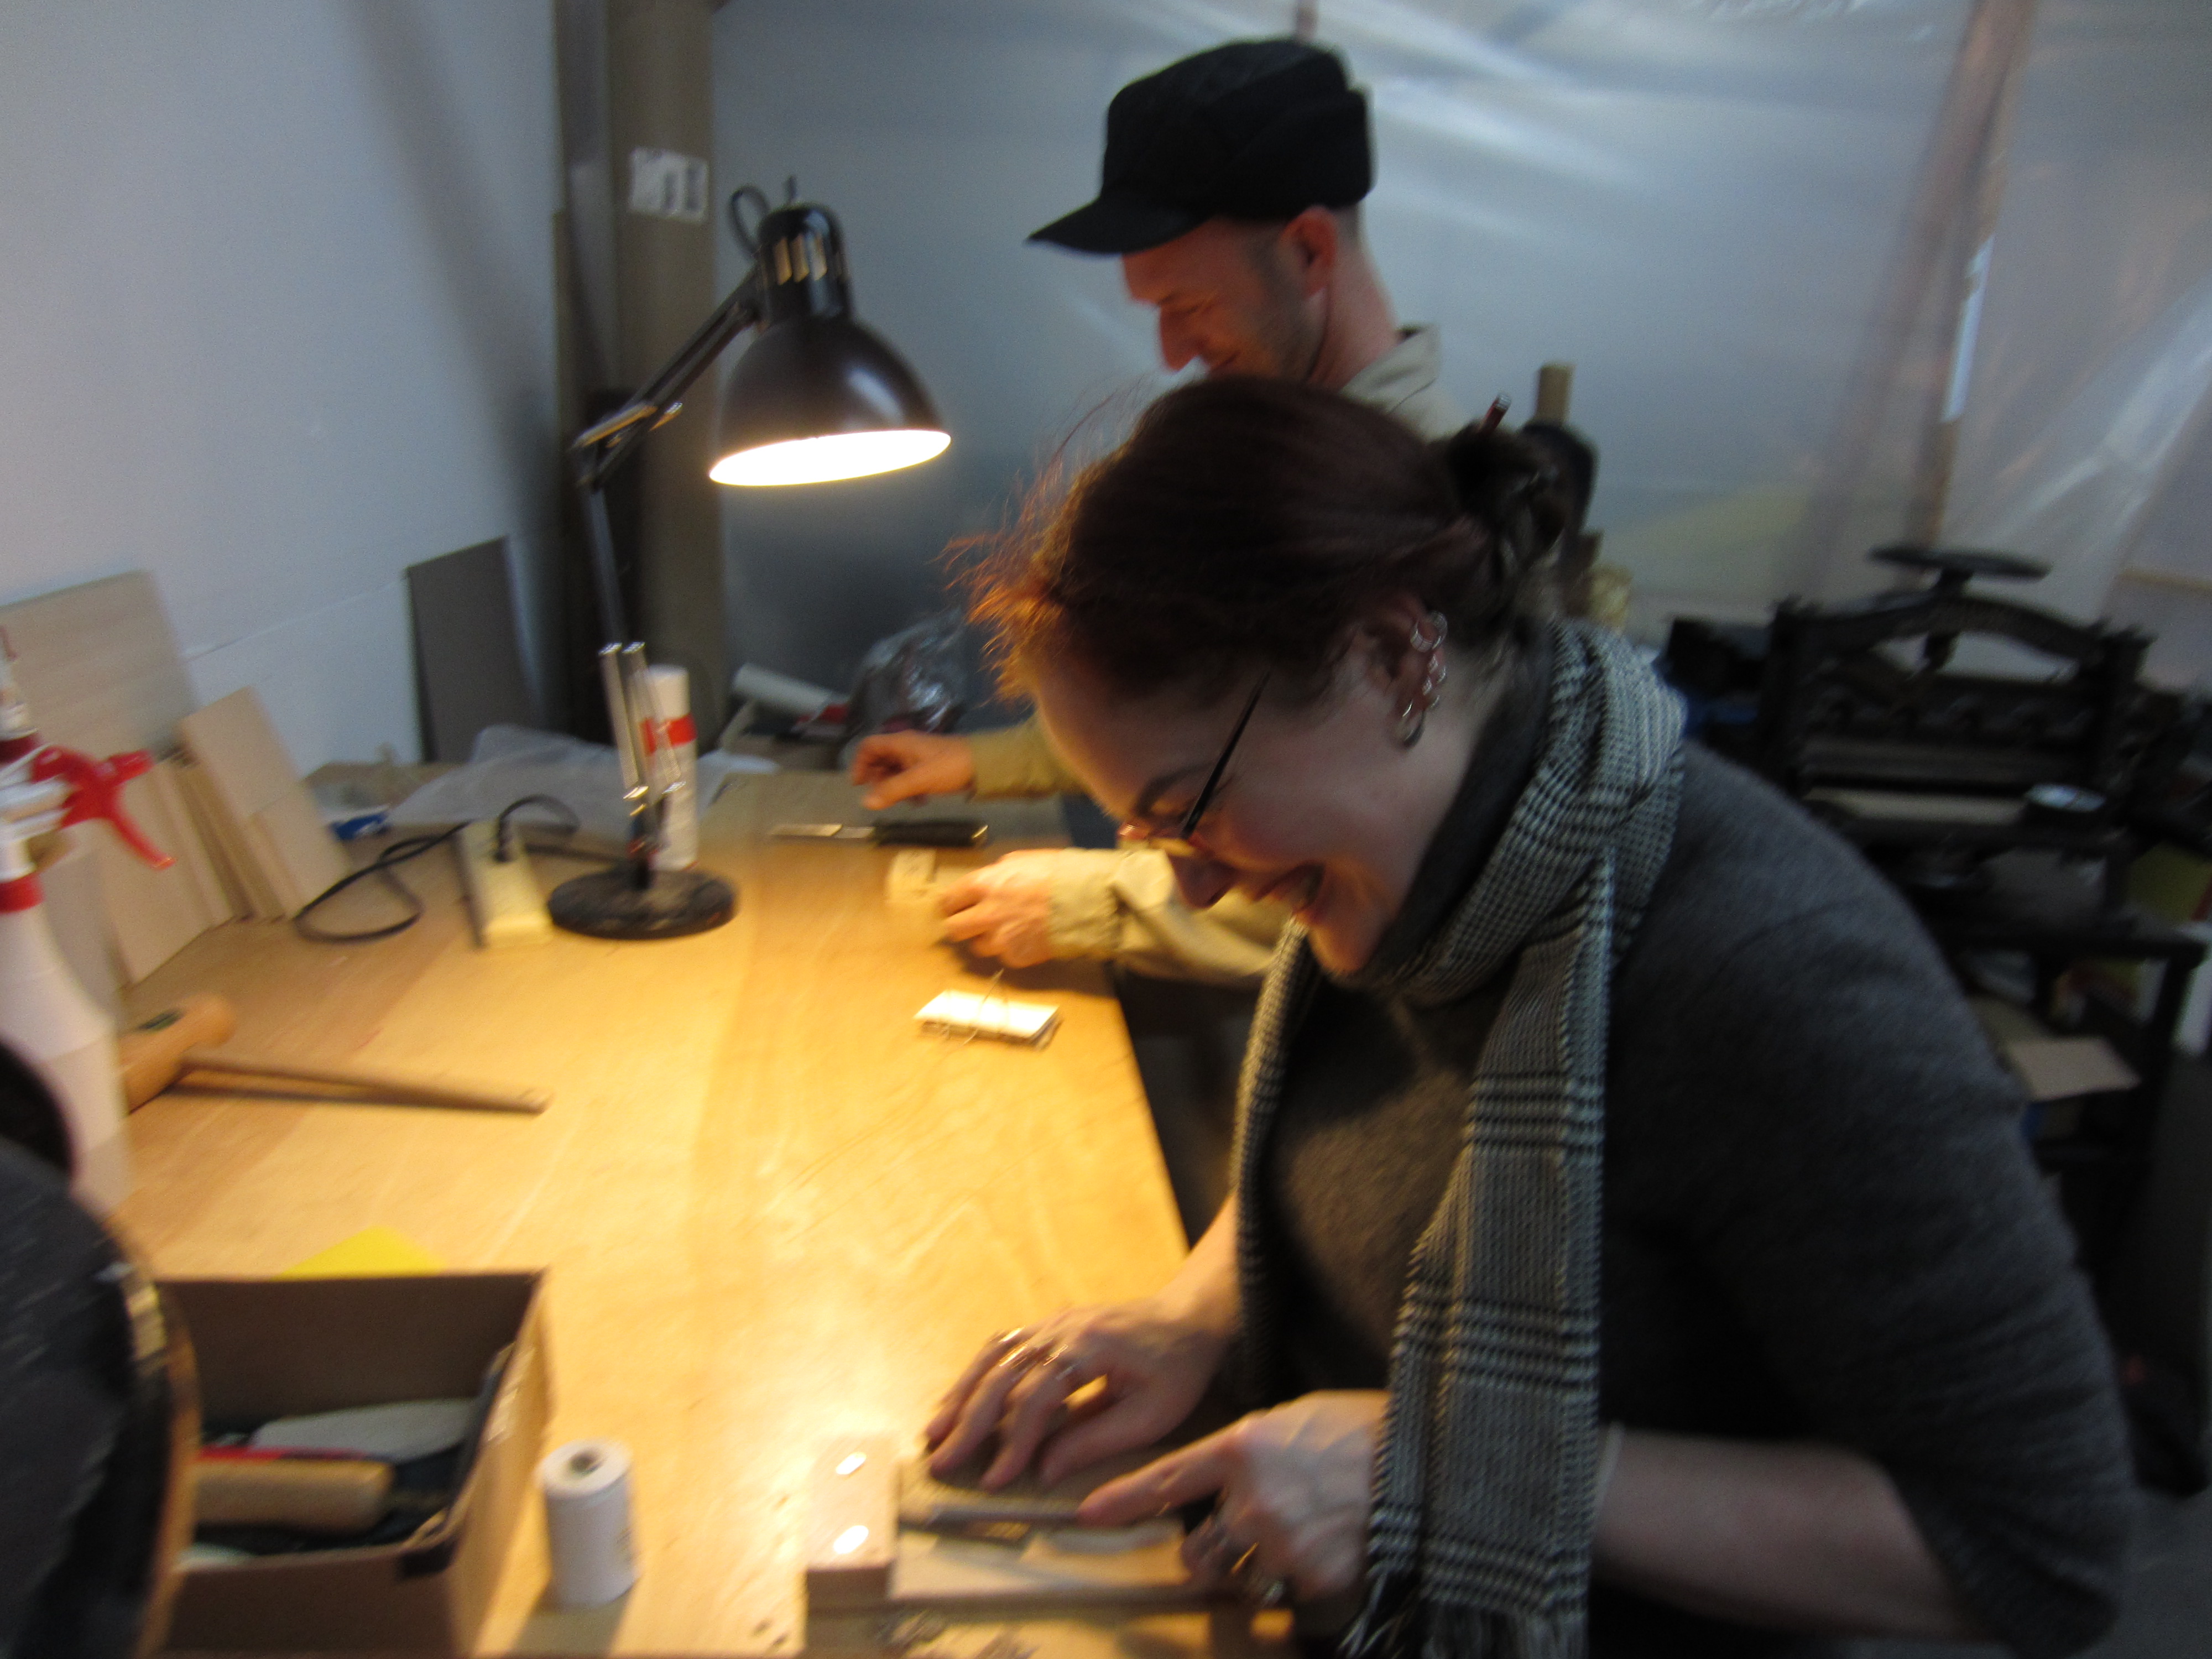
I’m looking forward to teaching at Biblioforge in March! Workshops are one of my favorite ways to meet new folks who are enthusiastic about making books. I love skill sharing with students, seeing that “aha!” moment occur when someone “gets it” as far as learning a new book structure is concerned. After all, there’s no substitute for holding a “real” book in your hands: turning the pages at your own pace, feeling the paper. And if you’ve made that book yourself? Well, there’s truly nothing like it.

Jennie Hinchcliff currently teaches book arts classes in Fine Art Department at the Academy of Art University, as well as numerous workshops nationally and locally. You can follow her postal adventures at: http://redletterdayzine.wordpress.com/ 


Medieval Pocketbooks in Oakland

Four people showed up for the Medieval Pocketbook and made steady progress throughout the day.

The text block consisted of six signatures  totaling 96 pages. They folded, punched and sewed on cords.

Punching holes in signatures in preparation for sewing

Punching holes in signatures in preparation for sewing

When that was completed, they pasted up the spine and set the text block aside. The next challenge was to take wooden boards and shape them with a chisel. The shaping is designed to keep the book from being too heavy and remove edges that can hurt the owner or get damaged in use. Two students had never used a chisel before, so they were excited to develop some skill in using this tool.

IMG_1573 IMG_1572 IMG_1569 IMG_1568 IMG_1566

Once the boards were shaped, they drilled the boards to accept the cords and cut a channel for the cords to lay in.

A quick lining of the spine with linen helps to consolidate the connection of text block to board attachment.

They chose leather and decided about metal decoration next. In some instances, leather was applied prior to metal, and in others, metal went on the boards first.

Metal selection

Metal selection

As the afternoon wound up, the books were completed to the level each student wanted. (One student wanted to make an exposed model to remind her of the structure).

Notes by Jennie Hinchcliff of RedLetterDayZine

Notes by Jennie Hinchcliff of RedLetterDayZine

Making something from paper, thread, wood, leather and metal gives one insight into the mechanics of the reading machine called “book” and it continues to enthrall the craftsperson that makes one.

IMG_1597 IMG_1595 IMG_1591

Finished books!

Finished books!

I’ll be doing this again on February 9th, for those that couldn’t make it last Saturday.